![]() Composing Messages
Composing Messages
![]() Major Menus
Major Menus
The user can select the e-mail address as follows:
(1) ID@domain: General method
ex) skyi@abc.co.jp
(2) "name"
ex) "sky"
(3) ID: An ID registered in the same domain (the current mail server)
ex) sky
(4) Name: A name registered in the same domain (the current mail server)
ex) Sky
(5) @: The user can add "@" to the group name. For example, if there is a group named "DevelopmentDepartment", the user can input "@DevelopmentDepartment" in [To] field.
When sending messages to multiple recipients, separate addresses by comma (",").
(Example) "sky"
In the above example, it is assumed that an address named "sea" has been registered in the address book.

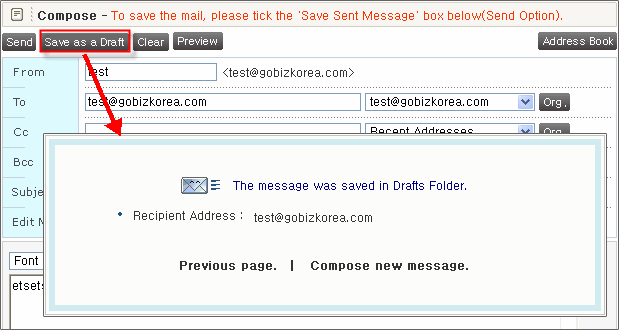
Click on [Compose] from the main menu to compose a message. Type in the recipient, the subject, and contents, and click on
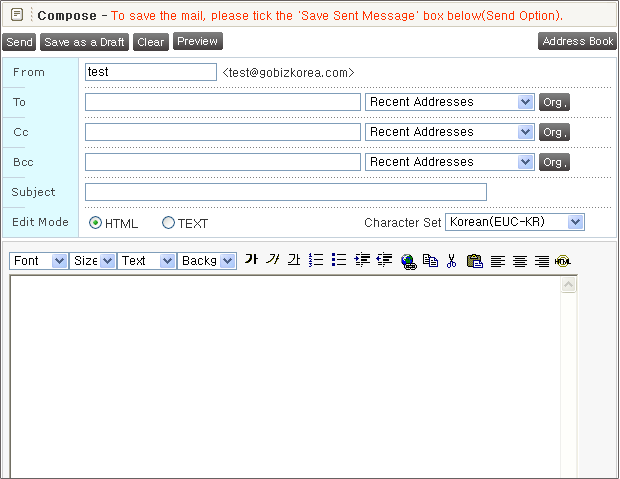
The user can compose a message as referring to [Address Book].
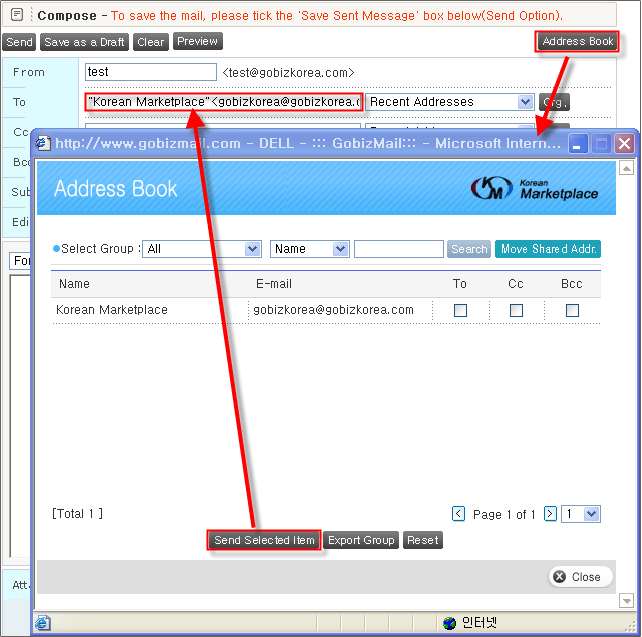
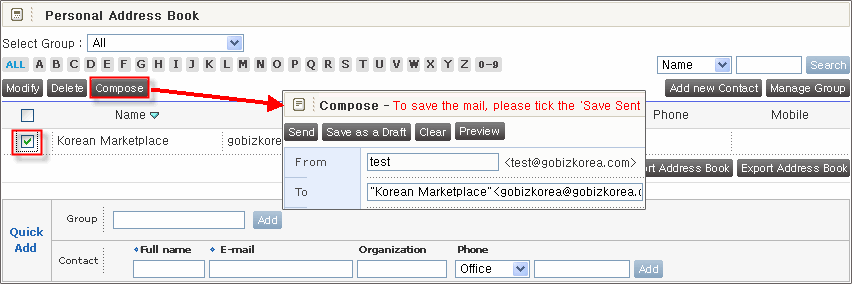
The user can send a message to an address stored in the address book by clicking on the corresponding address in the address book. The user can also send a message to multiple recipients by selecting multiple recipients. Then, all selected addresses will be inputted in [To] field of the message composition window.
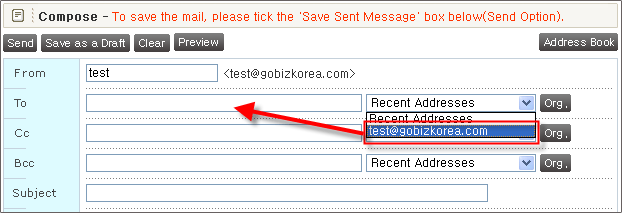
After the user sends a message, the recipient's address is saved in [Recent Addresses] as a history. Maximum 20 recent addresses are saved. The user can easily select the recipient address using Recent Addresses function. To use [E-mail List], select the address from the list box.
Normally, sent messages are not saved in Sent folder. However, if the user wishes to store sent messages, select [Options] -> [General Preferences] -> [Save Sent Messages], or select [Save Sent Message] at the bottom of the message composition window when composing a message.
To append the signature to the message, select [Options] -> [Signature], set the signature, and select [Attach].
The user can select the edit mode - HTML or Text - in [Edit Mode]. To permanently set the edit mode, select [Options] -> [General Preferences] -> [Compose] and select the edit mode.


Click on [Browse] button of the attach window to select the file. Select the file to attach, and click on [OK] on the file selection window. Then, the selected file will be added. Click on [Add]. Then, "Attaching the file��." will be displayed if the attachment is big. After the file is completely attached, the message window will be closed and the corresponding file will be attached below the message contents.
The user can define the priority of the message to send.
Before sending a message, select the priority in the priority box.
Then, the priority of the message will be displayed in front of the message subject.
However, some programs may not support displaying message priorities.

The user can schedule the time to send messages without needing to send the message right after composition. To do this, the user only needs to select the time, select Schedule Delivery, and click on [Send].
